Steps:
Install Python.
Install and IDE (Microsoft VSCode or PyCharm).
Creating a virtual Environment.
In an enterprise environment, follow your IT administration teams instructions for installations. Like raising a ticket or incident.
Installing Python
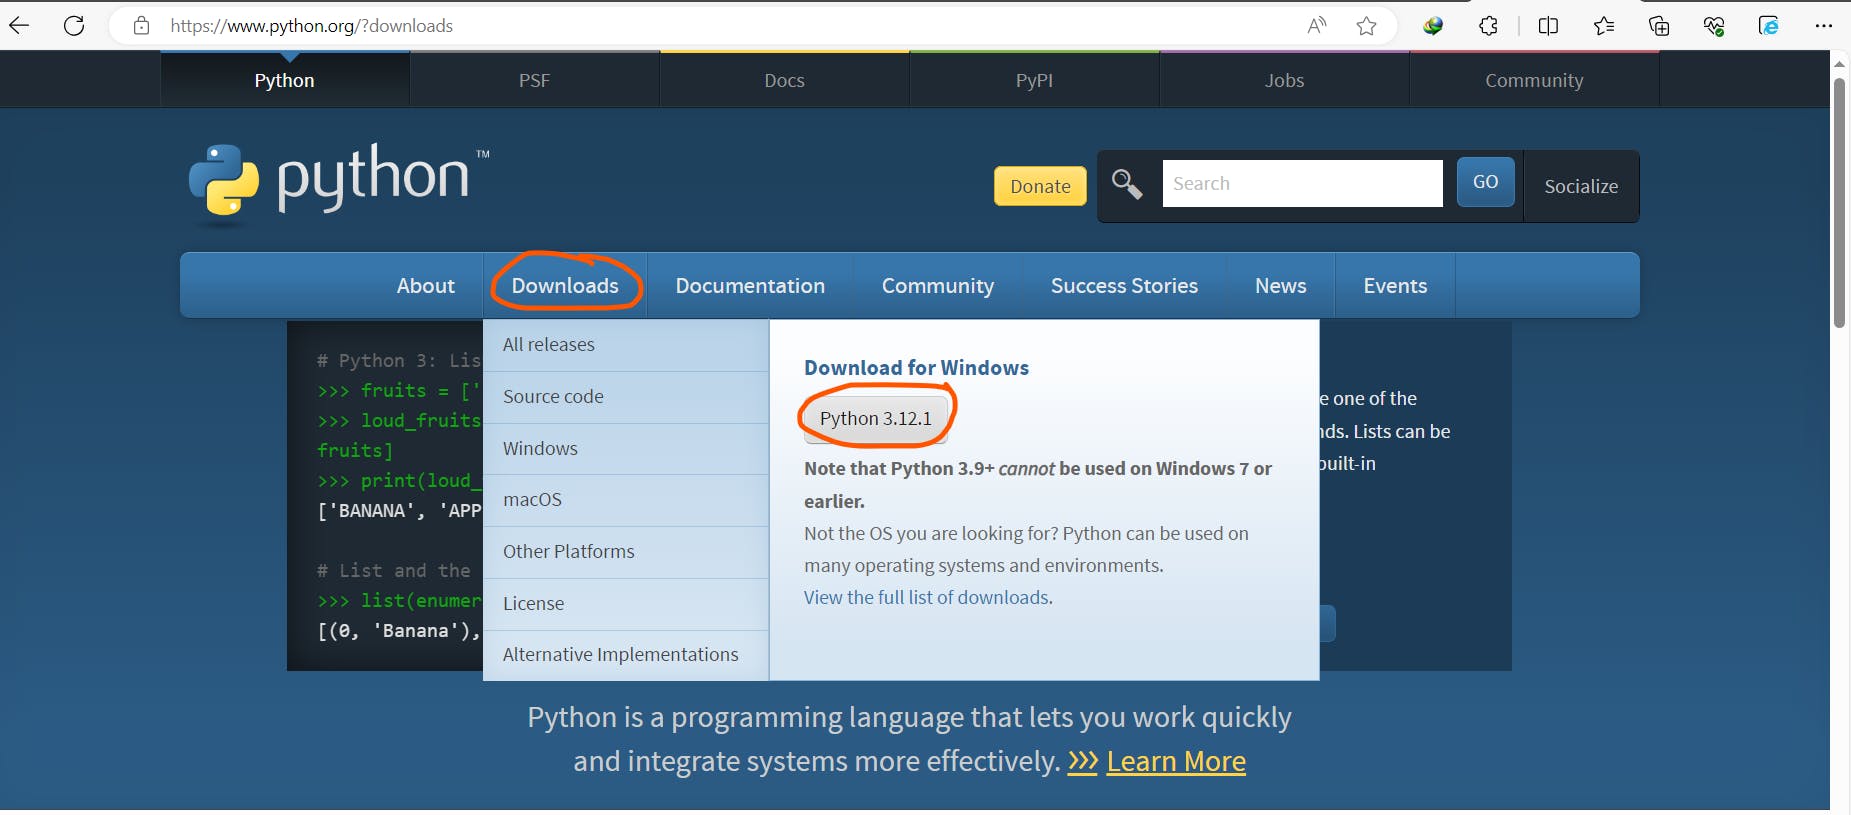
- Navigate to https://www.python.org/?downloads, click on the sections highlighted in the below screenshot.

Once downloaded, double click on the downloaded file and follow onscreen suggestions, choosing yes or ok.
To verify if python got installed run the following command in a terminal
python --version, it should return version details.

Installing an IDE
Navigate to corresponding websites:
Microsoft visual studio code: Download Visual Studio Code - Mac, Linux, Windows
PyCharm community edition: Download PyCharm: Python IDE for Professional Developers by JetBrains
Double click on executables and follow onscreen instructions.
After completion you will find them in windows search or as shortcuts on desktop.
Creating a Virtual-Environment
Virtual environment's help in isolating python packages to be installed and restricted for a specific project. A virtual environment can be created and activated with couple of commands.
Navigate to a desired folder where you want to place your project files.
Open terminal at same location and run
python -m venv .venvIt will create a new folder named
.venvTo activate the virtual environment use
.venv\Scripts\activate.batThe command prompt will change as shown below.

You can now open the projects in your favorite IDE and open terminal in IDE to work with a virtual environment.
Best Practice:
Place all your project requirements in a
requirements.txtfile at root folder so it can be installed easily.To install packages from requirements.txt use
pip install -r requirements.txt